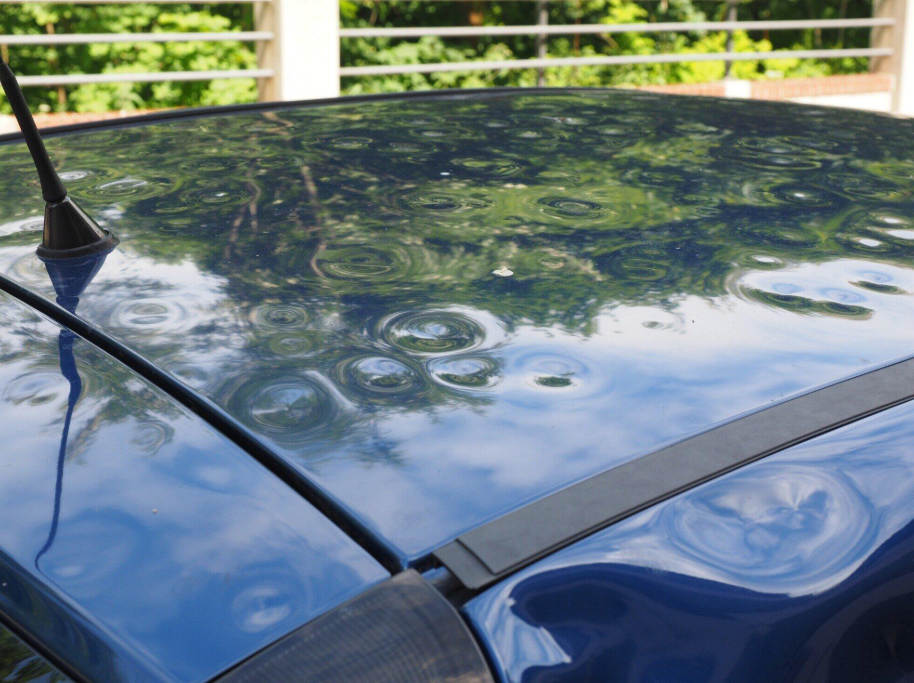
Dent removal can feel tricky for beginners. You don’t want to damage the paint. You want smooth, clean results.
That is where paint-free methods help. This guide shows you how to use the right tools. You will learn which ones do the best jobs.
You will also see how to use them carefully. Do you want dents gone without repainting your car? Read on and find a clear path to neat, safe dent repair.
Understanding What Paint-Free Dent Removal Means
Paint-free dent removal works by reshaping metal from behind. It keeps the original finish intact. No sanding, no fillers, no repainting needed.
The key is a gentle force spread over a broad area. It’s a process of pushing or pulling dents until they vanish. For small dings or hail damage, this method shines.
It relies mostly on technique, patience, and steady hands. It’s also more eco-friendly because you avoid chemicals and extra materials. Once you know what you’re doing, the results look factory-original.
Key Tools for Pushing Out Dents
Some dents you must push out from the inside of the panel. You use long rods or “knuckles” with curved or hooked ends. These tools let you reach behind a dent area.
Then you push bit by bit until it returns to shape. The rods come in many lengths and tips for tight spaces. You often need light touch to avoid over-pushing.
You may need support tools like tabs or pads to brace the surrounding metal. Practice with simple dents first so you build muscle memory.
Pulling Tools and Glue Methods
When you cannot reach behind, you pull the dent out from the outer side. Glue tabs and lifters help with that. You stick a tab on the dent and attach a pulling device.
Then you pull gently until the surface lifts back. Sometimes you use a slide hammer or mini slide tool to pull. The glue must hold well, but also release without damage.
Choosing proper glue strength is vital. After pulling, you clean off the glue residue. This method pairs nicely with pushing techniques for final shaping.
Knockdown and Tapping Tools
After pushing or pulling, small high spots may remain. That is where knockdowns and tap hammers help. These tools allow you to tap down tiny bumps.
Use a soft face or nylon tip to avoid marking paint. Light taps around the area help even out the surface. You may use a “hammer & tap rod” combo to refine lines.
The goal is smoothness without dents or ripple marks. Operators often listen for a change in sound to know when the area is flat. This finishing step polishes the job.
Lighting, Reflection Boards, and Inspection Aids
Good lighting helps you see dents and shape changes. Reflection boards or LED lights cast lines across the surface. These lines reveal imperfections in curves.
You slowly move the tools back and forth while watching those lines bend. Small distortions show where the metal is too high or too low. A magnifier or mirror may help for hidden areas.
Inspect from many angles. The visual feedback guides your hand more than force. Better light means fewer mistakes and faster repairs.
Support and Backup Tools
To prevent damage, you often need backup support. For instance, rubber or plastic pucks behind a dent can cushion force. You might use wedges, panel props, or screws to access the back side.
Also, tools like tabs, sticks, or spreader bars can brace surrounding panels. These supports prevent flex or stretch when pushing or pulling.
Without proper backup, the metal may warp or ripple. Good kits typically include these support items. Using them wisely gives you control over delicate shaping.
Choosing Quality PDR Tools for Better Results
Investing in decent PDR tools pays off in better repairs and less frustration. High-quality parts resist bending or losing shape. Metal Medic, for example, offers rods, tabs, and glue systems made for professionals.
Their tools work reliably and last longer. When your tools feel sturdy, you work with confidence. Cheap tools may twist or break under strain.
That leads to errors and damage. A good kit speeds up learning. A quality set supports your growth. Over time, your results improve because your tools stay true.
Safety, Practice, and Common Mistakes to Avoid
Always protect yourself when working on cars. Wear eye protection, gloves, and steady footing. Work slowly. Test on small dents first. Don’t force metal too fast.
Over-pulling or over-pushing causes splits or ripples. Don’t skip inspection steps. Many mistakes come from skipping gentle finishing touches.
Also, avoid using strong glue too soon. Let the metal settle between adjustments. When stuck, step away, reassess, or use a lighter tool.
With practice, you learn correction techniques. Mistakes teach you how metal behaves. Keep your workspace well-lit and free from clutter to stay safe.
Caring for Your PDR Tools and Storing Them Properly
Proper care keeps your PDR tools working well for years. Clean rods, tabs, and hammers after every job. Wipe off glue residue and dirt so they stay smooth.
Store rods upright or hang them to avoid bending tips. Keep small tabs, knockdowns, and glue sticks in organized boxes. Moisture and dust can cause rust or sticky buildup, so use a dry, cool storage place.
Sharpen or replace worn tips when needed to maintain precision. Regular checks ensure your tools stay safe and reliable.
Well-kept tools save you money and time. They also help you deliver cleaner results every time you fix dents.
Consider This Guide to PDR Tools for Smooth, Paint-Free Dent Removal
Paint-free dent removal is a clever, clean way to fix car dents. You can remove dents without harming the paint. With tools for pushing, pulling, and tapping, you shape metal carefully.
Strong lighting and support aides guide your hand. Quality PDR tools help you do better work with less risk. Be patient and safe while practicing on simpler dents first.
Over time, your skills improve, and your results look new. If you take it slow and steady, you will gain confidence and success.
Did you find this article helpful? If so, check out the rest of our site for more informative content.


